Flow Rate Calibration
Flow ratio determines how much filament is extruded and is crucial for high-quality prints.
A properly calibrated flow ratio ensures consistent layer adhesion and accurate dimensions.
- Too low flow ratio causes under-extrusion, which leads to gaps, weak layers, and poor structural integrity.
-
Too high flow ratio causes over-extrusion, resulting in excess material, rough surfaces, and dimensional inaccuracies.
- Credits
Warning
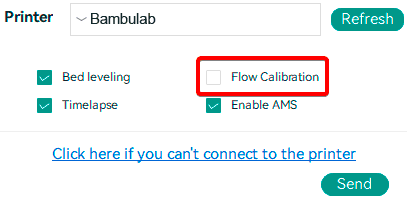
BambuLab Printers: Make sure you do not select the 'Flow calibration' option.
Note
After v2.3.0, the Top Pattern changed to Archimedean chords from Monotonic Line.
Calibration Types
- YOLO: A simplified method that adjusts the flow rate in a single pass using the formula
OldFlowRatio ± modifier.- Recommended: calibration range
[-0.05, +0.05], flow rate step0.01. - Perfectionist: calibration range
[-0.04, +0.035], flow rate step0.005.
- Recommended: calibration range
- 2-Pass Calibration: the legacy method, using two passes to determine the optimal flow rate with the formula
OldFlowRatio * (100 + modifier) / 100.
OrcaSlicer > 2.3.0 Archimedean chords + YOLO (Recommended)
This method uses the Archimedean Chords pattern for flow rate calibration with the YOLO (Recommended) approach.
- Select the printer and the filament you want to calibrate. This method is based on the filament's current flow ratio, so make sure you select the correct filament before proceeding.
- In the
Calibrationmenu, under theFlow Ratesection, selectYOLO (Recommended). - A new project with eleven blocks will be created, each with a different flow rate modifier. Slice and print the project.
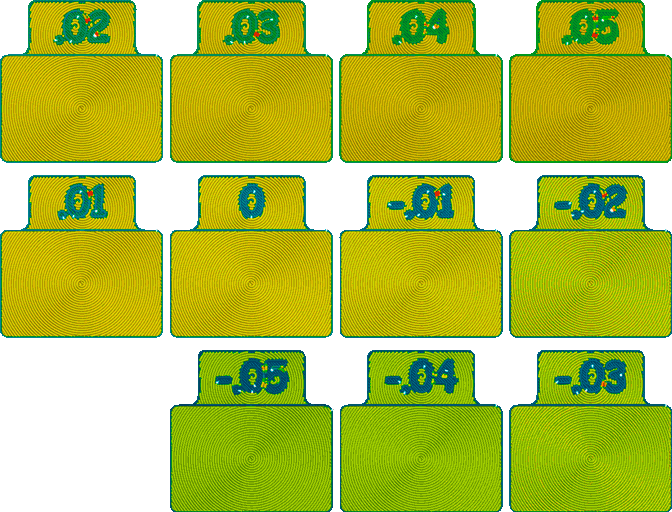
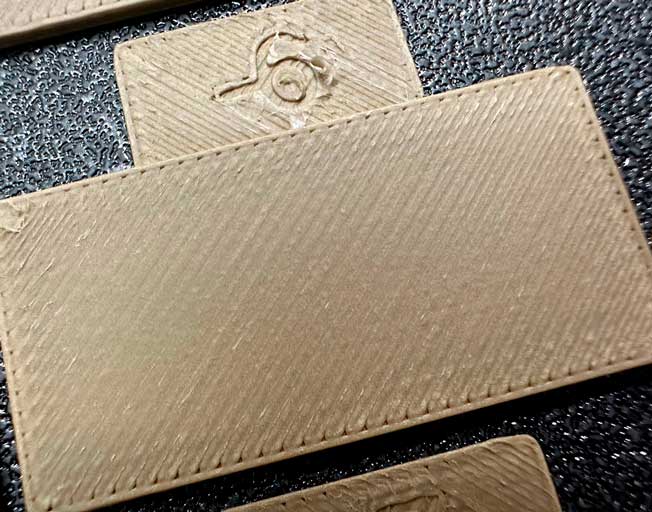
- Examine the printed blocks and identify the one with the best surface quality. Look for:
- The smoothest top surface.
- No visible gaps between the pattern arcs.
- Minimal or no visible line between the Inner Spiral and the Outer Arcs.

In this example, the block with a flow modifier of+0.01produced the best results, despite a visible line between the Inner Spiral and the Outer Arcs; reducing the flow further begins to show gaps between the lines.

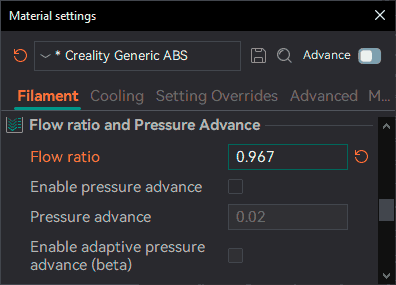
- Update the flow ratio in the filament settings using the equation:
OldFlowRatio ± modifier. If your previous flow ratio was0.98and you selected the block with a flow rate modifier of+0.01, the new value would be:0.98 + 0.01 = 0.99.
Remember to save the filament profile.

Note
The new Archimedean chords pattern uses a specific print order that prints the inner spiral last so you can check for material accumulation on the contact line at the end.
OrcaSlicer <= 2.3.0 Monotonic Line + 2-Pass Calibration
This example uses the Monotonic Line pattern with the 2-Pass Calibration approach.
- Select the printer, filament, and process you want to use for the test.
- In the
Calibrationmenu, under theFlow Ratesection, selectPass 1. - A new project with nine blocks will be created, each with a different flow rate modifier. Slice and print the project.
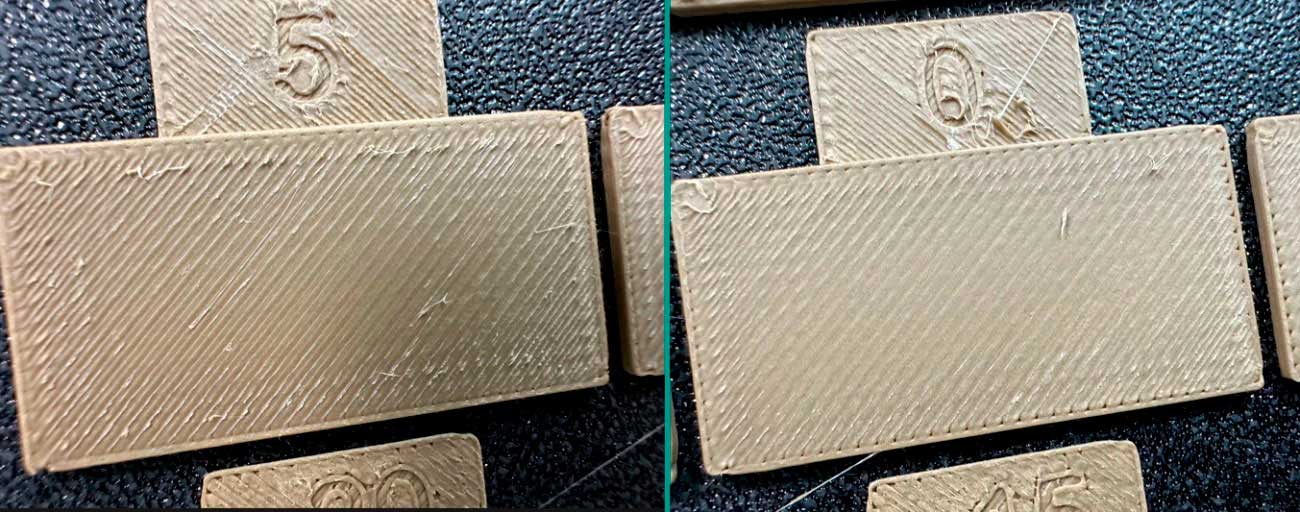
- Examine the blocks and determine which one has the smoothest top surface.

- Update the flow ratio in the filament settings using the equation:
OldFlowRatio * (100 + modifier) / 100. For example, if your previous flow ratio was0.98and you selected the block with a flow rate modifier of+5, the new value would be:0.98 × (100 + 5) / 100 = 1.029. Remember to save the filament profile. - Perform the
Pass 2calibration. This process is similar toPass 1, but a new project with ten blocks will be generated. The flow rate modifiers for this project will range from-9to0. - Repeat steps 4 and 5. For example, if your previous flow ratio was
1.029and you selected the block with a flow rate modifier of-6, the new value would be:1.029 × (100 - 6) / 100 = 0.96726. Remember to save the filament profile.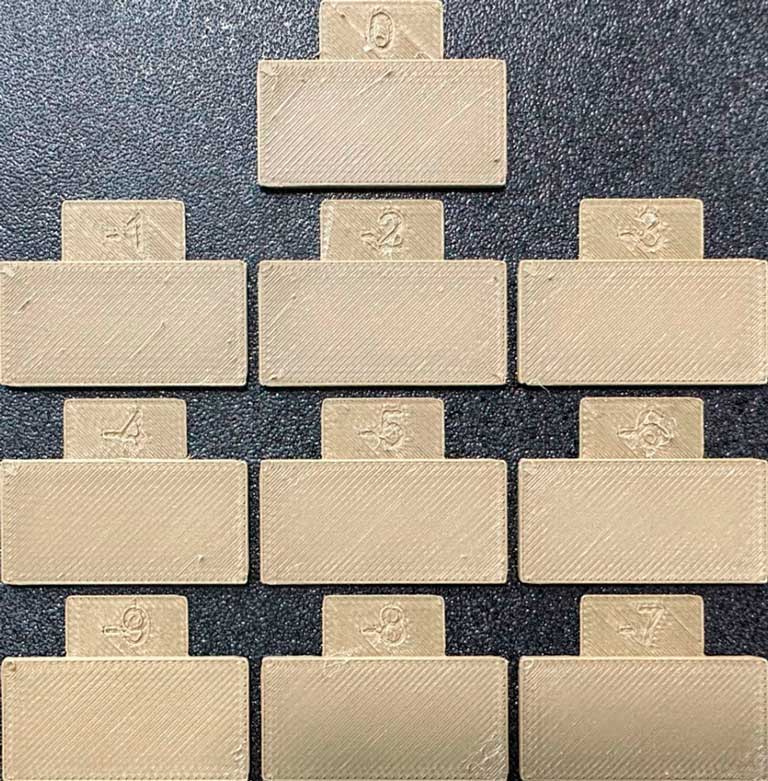
Tip
@ItsDeidara has created an HTML tool to help with these calculations. Check it out if you find the equations confusing: Orca-Slicer-Assistant.